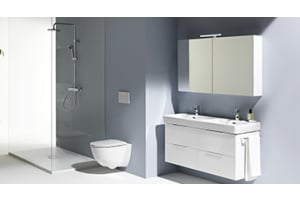
Shower panels not only enhance the beauty of your bathroom but also act as a shield that protects the wall from water splashes, soap scum and other harmful materials that can damage the walls.
Choosing a wall panel totally depends on your idea of a perfect bathroom. There are several options available when it comes to bathroom wall panels. However, a more waterproof solution with better protection is required in splash zones such as the inside walls of your shower enclosure, the region above your bath, and the space behind your basin.
So, to help you choose and install these wall panels, we have made this guide that covers all these aspects while keeping the simplicity and originality of your bathroom. If you were looking for something like this, you’re at the right place.
But before going to installation, there are a few things you need to figure out first.
Measure your walls
You'll need to know how much space you'll need to cover, whether you're just renovating the inside walls of your shower enclosure or working all the way around your bathroom. So have a good look at all the walls, take measurements carefully, figure out where you need wall panels to be, and note that down. Before buying the panels, you must have all the measurements you need.
Selecting the wall panels
After measurements, you need to figure out what kind of bathroom interior you want. What kind of vibe do you want to create in your bathroom? When you've done that, buying the colors you want will be easier, the designs you like, etc. There are multiple options available and various qualities to choose from. When you're done working out what you need, match your measurements to the panels.
Prior to installation
After choosing and buying your shower panels, and taking delivery, where possible store them before installation on a flat surface as standing up leaning against a wall can cause them to warp.
It is strongly advised that you match your panels before installation by putting them flat in the bathroom, where they will be installed for 48-72 hours. They should not be placed at an angle against walls or between supporting structures.
Fitting shower panels
The installation instructions may differ slightly based on your selected brand and design. As a result, always refer to the instruction manual when installing them.
You will need
- Caulking gun
- Safety goggles
- Tape measure
- Sharp blade
- Electric or fine tooth saw
Now finally, here’s how you fit shower wall panels
- Take measurements of the area where the wall panels will be installed. This includes both horizontal and vertical dimensions. Wall panels can be installed over various surfaces, including tiles and plasterboard.
- Lay the panel flat on supports with the front-facing up, then draw your cutting lines on the panel. Masking tape strips will assist in preserving the edges when cutting the panels down to size.
- Remove the extra wall panel with care using the electric saw. When using these tools, remember to use safety eyewear. Chrome trims can be used to give edges a beautiful clean finish.
- Sand all of the cut edges with a sanding pad. This will result in a smooth finish and the removal of any debris. Now, flip the panel over and sand the surface if necessary with the sanding pad.
- That way, the sealant will be able to make a stronger bond.
- An end U trim should preferably be used before the first panel if fitted. Apply a thin bead of sealant to the wall before positioning this trim and be particularly careful that it is fitted true vertical. This will ensure that each subsequent wall panel is also true vertically when fitted afterward.Use good quality silicon onto the walls and back of the panels and push the panels firmly against the wall until such time that you can feel it is secure.
- Each subsequent panel can now be fitted and should slot in nicely as they have a tongue and groove edge.
- When you have reached the end of a run finish with either an end trim or internal or external corner trim if carrying on to another wall. Seal the inside of the trim and the very edge of the wall panel with sealant.
- Lift the panel into place and tilt it into the corner piece. This keeps the tape from sticking to the wall until the panel is properly positioned.
- Repeat with the remaining wall panels, ensuring they are properly positioned before smoothing down firmly. You can utilize tongue and groove joints if you want a less noticeable join. Using masking tape here, you can retain a good, crisp finish while applying the sealant.
- Remove the tape and slide it into position. Run the silicone finishing tool along the groove to complete the bond.
- When sealing the panels to the floor, use the same method. With a little sealant, you're done.
Conclusion
- Shower panels are an excellent replacement for wall tiles. They're less in cost, durable and long-lasting. Banyo has made a complete guide for you, so you don't have to do the research yourself.