
Complete guide on how to Install an Undermount Ceramic Kitchen Sink
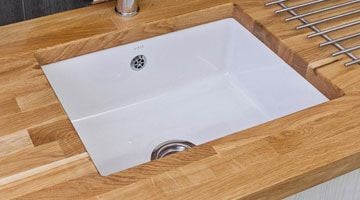
Undermount kitchen sinks provide you smooth, uninterrupted surfaces as they fit underneath the worksurface. They give your kitchen an exclusive appealing aesthetics when installed with wood, granite, or other solid surface worktops. The minimalist edgeless design format makes clean up and maintenance less time taking consuming. Correct installation of your Franke sink is important and requires a specialist installer. With stainless steel, as they are much lighter, small clips for installation can be used. However for the installation of a Undermount ceramic kitchen sink, with the extra weight, you will need to use the correct fixing clips which are usually supplied.
General Instructions:
1. Before the installation begins, it is always wise to inspect the sink. In the unlikely situation where there may be a manufacturing fault or transit damage, please do not have the sink installed. Contact your place of purchase and report the damage/fault immediately as usually after installation the retailer would not accept the sink back
2. For reasons which are understandable, any damage to the worktop during installation, would not be covered by Franke.
3. Franke recommends checking the bowl size and ensuring that the cabinet where you would like the sink fitted would accommodate it easily. Be mindful that the width of your unit and the space you have is not the same. Internal measurements will always be less due to the thickness of the carcase.
4. As ceramic kitchen sinks can vary in dimension, Franke does not provide any cut-out template. For exact cut-out and a better finish, it is best practice to give the actual sink to your templater.
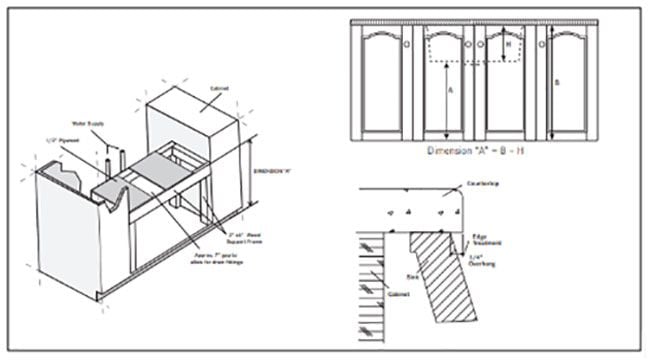
5. Construct a wooden frame that can support at least 300 pounds to support the weight of the ceramic sink.
6. Do not lift the sink without assistance.
Easy steps to Install Undermount Kitchen Sink:
Build a wooden support frame: build a wood frame to support sink toward "A" as shown in the picture.

Design a sink template
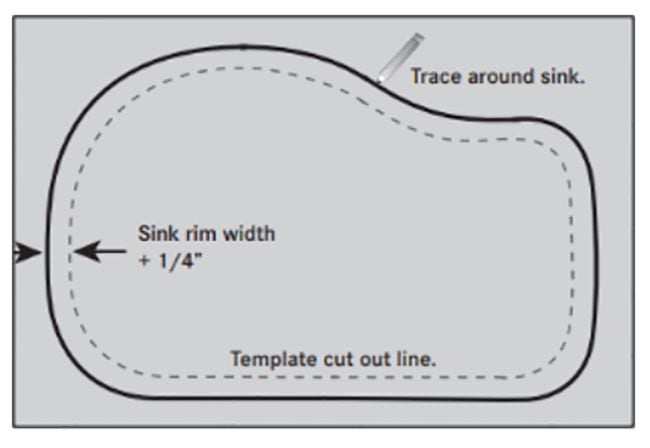
Follow these instructions to prepare a template
1. Take a paper and pencil and then place the sink on the paper upside down. Now trace the outside rim shape of the sink on the paper using a pencil.
2. Measure the sink dimensions using a measuring tape. Make sure to measure dimensions at several sink locations around the perimeter to get precise dimensions.
3. Add up 1/4" to the measured nominal dimensions for the overhang of the worktop.
4. Now draw a trace line inside the trace line by setting up a compass to the sink rim width plus ¼”.
5. Now carefully cut out the template by cutting at the innermost scribe line.
Preparing the worktop for the Installation:
1. Place the template on the top of the counter at your desired location and centre it to the sink base cabinet unit.
2. While positioning the template on the sink base cabinet unit ensure you have made provisions for the tap and other fittings.
3. Use a pencil to trace out the template outer edge at the cabinet unit and then cut-out the sink opening, following the traced line.

Prepare the sink for installation:
1. To make the installation process easier it would be better at this stage to cut out drainer grooves if these are required before the sink is fitted.
2. For easy installation, it is recommended to install sink taps and other surface-mounted fittings at this point as the sink will be accessible from all sides to make the installation process easier.
Sink installation:
After the installation of drainer grooves and sink taps, place the Franke ceramic kitchen sink carefully on the wooden support frame Seal all around and double-check that the sink is stable. If there is slight movement it would be best to adjust the support base at this stage.


